
How to Deep Clean a Kitchen: Step-by-Step Cleaning Guide
We all know the kitchen is where a lot of living happens—morning coffees, quick lunches, and family dinners. But in all that hustle, it’s easy for gunk and grime to pile up in corners you rarely notice. While wiping down counters helps with the everyday mess, every now and then your kitchen needs a really deep clean. Don’t let that thought stress you out! With a kitchen cleaning checklist in hand and a focus on kitchen hygiene, you’ll find the job is completely doable. If you break the work into steps, you can tackle each part one by one and bring back that sparkling, fresh feeling to your kitchen. Ready to get started? Here’s a step-by-step approach anyone can follow.
Preparation: Set Yourself Up for Success
Before you grab a sponge, gather your cleaning supplies. Having everything within reach saves time and keeps your momentum going. You will need microfiber cloths, a reliable kitchen degreaser, baking soda, white vinegar, glass cleaner, a stiff scrub brush, and a mop.
Clear the clutter off your countertops first. Put away random mail, stray coffee mugs, and small appliances you do not use on a daily basis. A clear workspace gives you room to move and protects your personal items from stray cleaning sprays. Empty your trash can and recycling bins immediately. This gives you a place to easily toss expired food or debris you find as you work your way through the room.
Start from the Top: Ceilings, Light Fixtures, and Upper Cabinets
Always clean a room from the top down. This strategy prevents dust and dirt from falling onto lower surfaces you have already washed. Use an extended duster to remove cobwebs from the corners of the ceiling and around the crown molding. Carefully wipe down your light fixtures. If your pendant lights or chandeliers have removable glass covers, take them down and wash them in the sink with warm, soapy water.
Next, focus your attention on your upper cabinets. Cooking grease travels upward, settling on cabinet doors and pulling dust with it. Spray a microfiber cloth with a mixture of warm water and mild dish soap. Gently wipe the exterior doors, hinges, and handles. Open the doors to wipe down the inside shelves, removing crumbs and dust.
If you notice persistent odors or suspect mold growth inside damp cabinets, remember that severe issues require specialized care. We are focusing on standard dirt and everyday grime in this guide. Always consult a professional remediation service if you encounter potential health hazards like black mold, as handling it without proper equipment can be dangerous.
How to Deep Clean a Kitchen Appliances (Fridge, Oven & More)
They work hard and collect all kinds of mess—so giving your kitchen appliances a real deep clean can make a bigger difference than you’d think.
The Refrigerator
To deep clean refrigerator shelves and compartments, take everything out of your fridge. Throw away expired condiments, wilted vegetables, and forgotten leftovers. Remove the drawers and shelves, washing them in the sink with mild soap and warm water. Wipe down the interior walls with a solution of water and baking soda to neutralize lingering food odors. Dry the shelves completely before putting them back and restocking your groceries. Don’t forget to vacuum the refrigerator coils in the back or underneath the unit. Dust buildup restricts airflow and forces the motor to work harder, which can shorten the lifespan of your appliance.
The Oven and Stovetop
Ovens are notorious for holding onto baked-on grease. If you’re wondering how to clean oven naturally, try applying a thick paste made of baking soda and water to the interior walls and base. Let it sit for a few hours, or ideally overnight, to loosen the burnt carbon. Wipe the paste out with a damp cloth, rinsing it frequently.
For the stovetop, remove the grates or burner coils. Soak them in a sink full of warm, soapy water while you scrub the stovetop surface underneath. Use a non-abrasive scrubber to remove tough, boiled-over stains without scratching the delicate enamel or glass finish.
The Microwave and Dishwasher
Microwaves accumulate food splatters incredibly quickly. Place a microwave-safe bowl filled with water and two tablespoons of white vinegar inside. Heat the bowl on high for five minutes. The steam will loosen stuck-on food particles on the ceiling and walls, allowing you to easily wipe the interior clean with a paper towel.
For the dishwasher, pull out the bottom rack and remove the filter. Wash the filter in the sink to remove trapped food debris. Reinsert the clean filter, place a cup of white vinegar on the top rack, and run an empty hot water cycle. This clears out hard water deposits and freshens the interior machine.
Scrubbing the Surfaces: Countertops and Backsplashes
Clear off any remaining items from your counters. Spray your countertops with a cleaner designed specifically for your material type. Granite and quartz require different care than laminate or porous butcher block. Wipe the surfaces thoroughly, paying special attention to the corners and the narrow gaps where the counter meets the stove or refrigerator.
Don’t skip the backsplash — it catches more splatter than it looks. Grease and sauce splatters often go unnoticed against patterned tile. A dedicated degreaser or a simple dish soap solution works wonders here. Use a soft bristle brush on the grout lines if they look dark or discolored.
Common Mistakes to Avoid When Deep Cleaning a Kitchen
As you go through your kitchen cleaning checklist, try to steer clear of a few classic missteps. One mistake is starting with the floors—dirt from upper surfaces will just fall back down and undo your hard work. Another is using the wrong cleaner for your countertop or appliance material, which can lead to stains or even damage. Many people also skip small but crucial spots like light switches, backsplash grout, and behind appliances, where grease buildup tends to hide. Rushing through the job or trying to do everything at once can make the task feel overwhelming and leave areas half-cleaned. Take your time, tackle one section at a time, and double-check those easily forgotten spots for a truly hygienic kitchen.
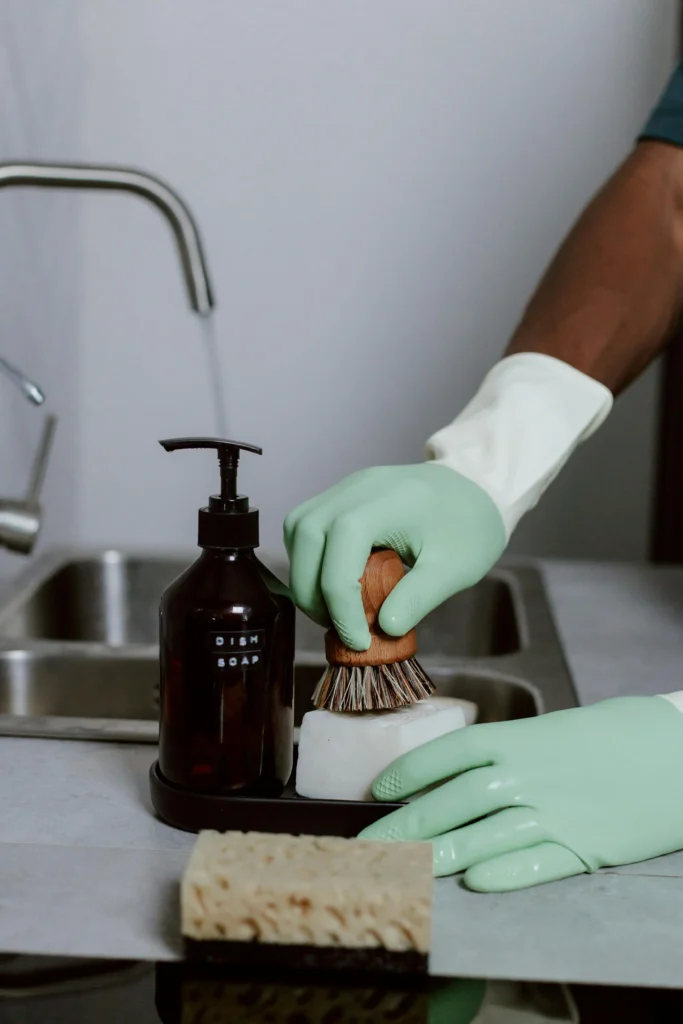
The Sink: The Heart of Your Kitchen Cleanup
The sink is easy to overlook — it drains, so it feels clean. It’s not. The sink is often the dirtiest spot in the entire room. Even if it looks relatively clean, bacteria can hide around the drain catch and under the faucet edges. Sprinkle baking soda generously all over the wet basin. Use a scrub brush to work the powder into a paste, focusing on the rim, the drain, and the corners of a square sink. Rinse the basin thoroughly with hot water.
If you have a garbage disposal, drop in a few lemon peels and a handful of ice cubes. Run the disposal with cold water for a few seconds. The hard ice helps knock debris off the grinding components, while the lemon leaves behind a fresh, clean scent. Finally, buff the metal faucet with a dry microfiber cloth to remove hard water spots and add a brilliant shine.
Recommended Tools for a Successful Deep Clean
Equipping yourself with the right cleaning tools makes the whole process smoother and more effective. At minimum, keep microfiber cloths for dusting and wiping (they grab grime with less effort), non-abrasive sponges, a stiff scrub brush for tough jobs, and an extendable duster for reaching ceiling corners. A high-quality kitchen degreaser tackles grease buildup on cabinets and appliances, while white vinegar and baking soda handle everything from sink scrubbing to deodorizing the fridge. Don’t forget a spray bottle for mixing natural solutions and a mop suited to your kitchen floor type. With the proper kitchen cleaning tools, each area will be easier to tackle, and your kitchen will feel cleaner with less effort.
Finishing with the Floors
The floor comes last because it has caught all the crumbs, dust, and drips you knocked down from the higher surfaces. Sweep or vacuum the floor thoroughly. Make sure to reach the broom under the toe kicks of your cabinets and deep beneath the refrigerator.
Now mop. Start from the far corner and work your way out. Use a cleaner suited for your kitchen floor—tile, wood, or vinyl. If grout lines look grimy, a grout brush and baking soda paste can lift stubborn stains and leave your floors looking fresh.
Frequently Asked Questions About Kitchen Deep Cleaning
What order should you deep clean a kitchen?
Start at the top: ceilings, light fixtures, and upper cabinets. Move to appliances, countertops, backsplashes, sink, then finish with the floors.
How long does it take to deep clean a kitchen?
Most kitchens take 2 to 4 hours for a thorough deep clean, depending on size and buildup.
How often should I deep clean my kitchen?
Deep clean your kitchen every three to four months. Regular maintenance, like wiping counters and sweeping, helps reduce major buildup between deep cleans.
What is the best natural degreaser?
Mix white vinegar, warm water, and a few drops of dish soap. This simple solution quickly cuts grease and lifts it off surfaces for easy cleaning.
How can I make this process less overwhelming?
Break the job into small tasks and spread them over a couple of days. Tackle appliances one day and cabinets, counters, and floors the next to make deep cleaning more manageable.
Are harsh chemicals necessary for a clean kitchen?
No. Baking soda, vinegar, and dish soap clean most kitchen surfaces. Save strong chemicals for tough, neglected messes.
Enjoy Your Spotless Space
When you take the time to do a real deep clean, your whole home feels refreshed—and honestly, you’ll notice the difference every time you step into your kitchen. Cooking becomes easier when you’re not dodging clutter or dealing with sticky spots that just won’t budge. Plus, sticking to a cleaning routine helps keep the mess to a minimum, saving you from marathon scrubbing sessions in the future. Now that you’ve got the tools and the know-how, why not pick a day and give your kitchen that well-deserved reset? You’ll love the comfort and calm of a spotless, organized kitchen. Honestly, the best part isn’t the clean kitchen — it’s how good it feels to cook in one.