A Complete Guide on How to Clean an Oven
Reviewed by Sarah Mitchell, professional home cleaning specialist.
Let’s face it, tackling baked-on grease and burnt food at the bottom of your range is nobody’s favorite chore. If you’ve been wondering how to clean an oven without turning it into an all-day project, you’re not alone. Many of us put it off for months, letting the mess build up until smoke sets off the fire alarm during dinner prep. But a clean oven can save you time, improve the taste of your food, and keep your kitchen safer. You don’t need harsh chemicals or endless scrubbing to get a sparkling interior. With a few common household ingredients and a bit of patience, you can transform your appliance. Let’s break down the easiest and most effective methods to get the job done right.
Table of Contents
Method 1: The Natural Baking Soda and Vinegar Approach
Using a baking soda paste is widely considered the safest and most effective method for regular maintenance. It avoids the harsh fumes of chemical cleaners and uses ingredients you likely already have in your pantry.
Step 1: Empty the Interior
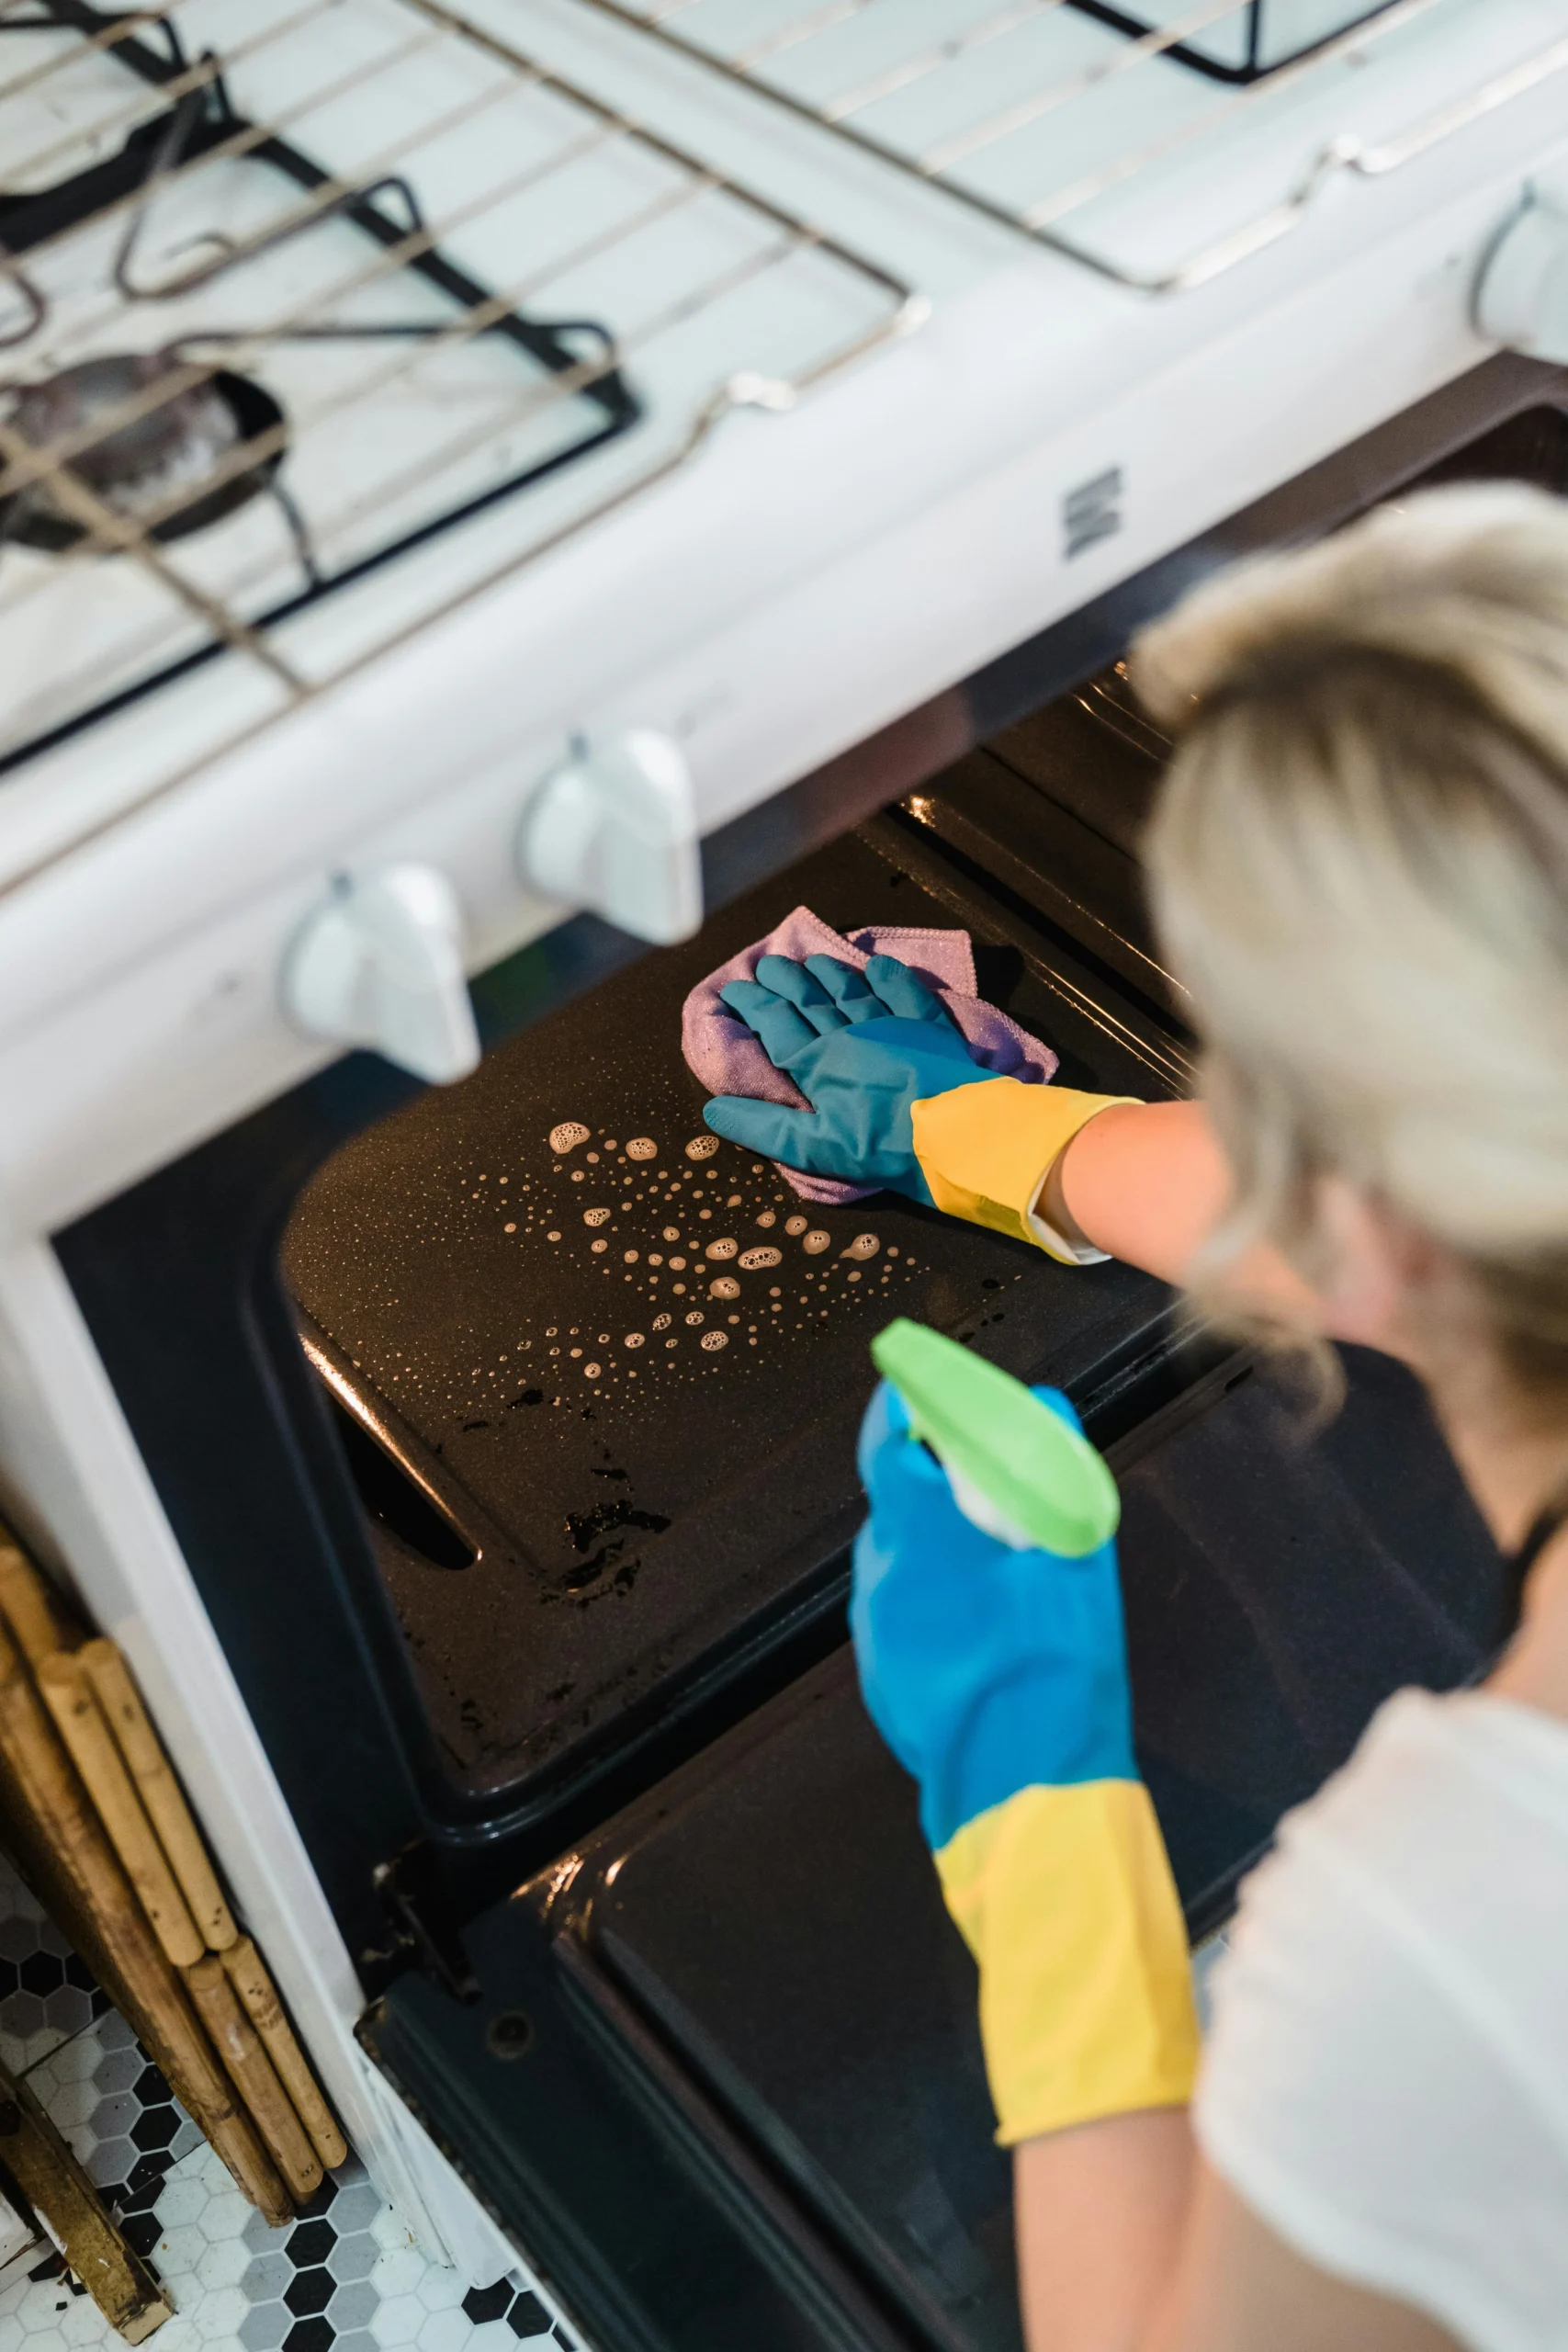
Start by removing everything from inside. This includes the wire racks, any pizza stones, oven thermometers, and foil you might have placed at the bottom. Set the racks aside; we will tackle those separately later.
Step 2: Mix Your Cleaning Paste
In your small bowl, mix half a cup of baking soda with a few tablespoons of water. Adjust the ratio until you have a spreadable paste. It should look and feel a bit like thick pancake batter or shaving cream.
Step 3: Coat the Inside
Put on your rubber gloves. Spread the paste all over the interior surfaces, paying special attention to the greasiest areas. The baking soda will turn a brownish color as it absorbs the grime. Keep clear of the heating elements, as applying paste there can cause damage or create smoke the next time you bake.
Step 4: Let It Sit Overnight
Patience is the secret ingredient here. Allow the baking soda mixture to rest for at least 12 hours, or overnight. This gives the natural abrasiveness of the baking soda time to break down the hardened carbon and grease.
Step 5: Wipe It Down
The next morning, take a damp dish cloth and wipe out as much of the dried paste as possible. Use your plastic scraper to gently lift off any stubborn, hardened spots.
Step 6: Spray with Vinegar
Put a little white vinegar in a spray bottle and spritz it everywhere you still see baking soda residue. The vinegar will react with the baking soda and foam gently. Take your damp cloth and do a final wipe-down until the interior is completely clean and shiny.
Method 2: Using a Commercial Cleaner
Sometimes a natural approach is not enough for an appliance that hasn’t been washed in years. If you need heavy-duty grease removal, a commercial product is the way to go.Read the instructions on your specific product carefully. Generally, you will spray the foam evenly across the interior, keeping it away from the heating elements. Most commercial cleaners require you to leave the kitchen and let the product sit for 20 to 30 minutes. The chemicals work incredibly fast to dissolve burnt sugar and fat.Once the time is up, wear your rubber gloves and use a damp sponge to wipe away the foam and the grime. Wash the interior thoroughly with clean water afterward to ensure no chemical residue is left behind to burn into your next meal.
Method 3: The Self-Cleaning Feature
Many modern appliances come with a self-cleaning setting. This feature locks the door and heats the interior to a very high temperature—often around 880 degrees Fahrenheit. This extreme heat turns any food residue and grease into white ash.While this sounds incredibly convenient, it comes with a few drawbacks. The high heat can sometimes damage internal components or blow a fuse. It also produces a very strong burning smell and potentially dangerous smoke if the interior is heavily soiled. If you choose this route, remove large pieces of food first, open your windows, turn on your exhaust fan, and keep pets and small children out of the kitchen. Once the cycle finishes and the appliance cools completely, simply wipe away the ash with a damp cloth.
Getting Your Racks to Shine
The wire racks often accumulate sticky grease that is notoriously difficult to remove. The easiest way to handle them is in your bathtub.Lay down an old towel at the bottom of your tub to prevent the racks from scratching the enamel. Place the racks on the towel and fill the tub with very hot water until the racks are fully submerged. Add half a cup of dish soap or a cup of laundry detergent. Let them soak for at least four hours, or ideally overnight.After soaking, the grime should easily wipe away with a sponge. For any remaining tough spots, a gentle scouring pad will do the trick. Rinse the racks thoroughly and dry them before sliding them back into place.
Clearing Up the Glass Door
A cloudy glass door prevents you from keeping an eye on your baking. To clean it, make another batch of the baking soda and water paste. Spread it generously across the inside of the glass window.Let the paste sit for about 30 minutes. Since the glass is smoother than the interior walls, it doesn’t need as much time. Use a damp cloth to wipe the paste away. Finally, spray the glass with standard glass cleaner or white vinegar and buff it dry with a paper towel or a microfiber cloth for a streak-free finish.
Frequently Asked Questions
How often should I clean my oven?
For most households, giving it a deep clean every three to six months is ideal. However, if you bake frequently or cook greasy foods like roasts, you might need to do it more often. Spot cleaning spills as soon as the appliance cools down will reduce the need for heavy scrubbing later.
Can I leave baking soda in the oven overnight?
Yes, leaving the baking soda paste overnight is highly recommended. The extended resting time allows the mixture to properly break down stubborn, baked-on grease, making it much easier to wipe away the next day.
Is it safe to use the self-cleaning feature?
It is generally safe if your appliance is in good working condition and not heavily coated in thick grease. However, due to the extreme temperatures, there is a small risk of blowing a thermal fuse. Always ensure the room is well-ventilated to handle any smoke.
What is the fastest way to handle this chore?
You will often hear people asking how to clean an oven quickly, and the honest answer is a commercial chemical cleaner. These sprays work in about 20 to 30 minutes. Just remember to use caution, wear gloves, and ventilate the room well.
Enjoy Your Sparkling Clean Kitchen
Maintaining your cooking space doesn’t have to feel like a dreaded project. By staying on top of small spills and setting aside a little time every few months for a deeper clean, you protect your appliance and help your meals taste the way they should. Whether you prefer the gentle power of baking soda or the speed of a store-bought cleaner, you have several solid options.One of the best ways to make oven cleaning easier is to avoid letting messes sit for too long. If cheese bubbles over or sauce splatters during dinner, wait until the oven has cooled completely, then wipe up the fresh spill before it hardens. That simple habit can save you from a lot of scrubbing later. It also helps prevent smoke and burnt smells the next time you turn the oven on.It’s also worth knowing what not to do. Avoid using steel wool on interior surfaces unless your appliance manual clearly says it’s safe. Harsh scouring tools can scratch the finish and make future buildup harder to remove. The same goes for using too much water around heating elements or vent openings. A damp cloth is usually all you need. If you use a commercial product, always follow the label and rinse thoroughly so residue does not linger inside the oven.For especially stubborn buildup, don’t rush the process. A second round of baking soda paste is often more effective than aggressive scrubbing. Apply it again to the problem area, let it sit for several more hours, and then loosen the residue with a plastic scraper. Slow, repeated treatment is usually safer and gives better results than trying to remove everything in one pass.You can also make the job easier by cleaning in sections. Some people find it less overwhelming to tackle the racks one day, the glass door the next, and the interior after that. If your oven is heavily soiled, breaking it into smaller tasks can make the process feel more manageable and realistic.Another helpful tip is to check your owner’s manual before using any cleaning method, especially on newer ovens with specialty coatings, hidden bake elements, or steam-clean settings. Some models are designed for gentler maintenance and may warn against certain cleaners or abrasive tools. A quick check can help you avoid accidental damage.If odors linger even after the oven looks clean, heat can reveal leftover grease in corners or along the door seal. In that case, inspect the edges, the bottom panel, and the area around the hinges. These spots are easy to miss and often hold onto grime. A careful final wipe in those areas can make a big difference.A clean oven is about more than appearance. It can help reduce smoke, improve visibility through the glass door, and make everyday cooking feel a little better. When your appliance is clean, you can focus on the food instead of the mess left behind from the last meal. And once you’ve done a full deep clean, regular upkeep becomes much simpler.So instead of waiting until the buildup becomes impossible to ignore, try turning oven care into a routine part of kitchen maintenance. A little effort now and then goes a long way. Grab your gloves, mix up that paste if needed, and give your oven the refresh it deserves. If you stay consistent, the next cleaning session will be faster, easier, and far less frustrating.